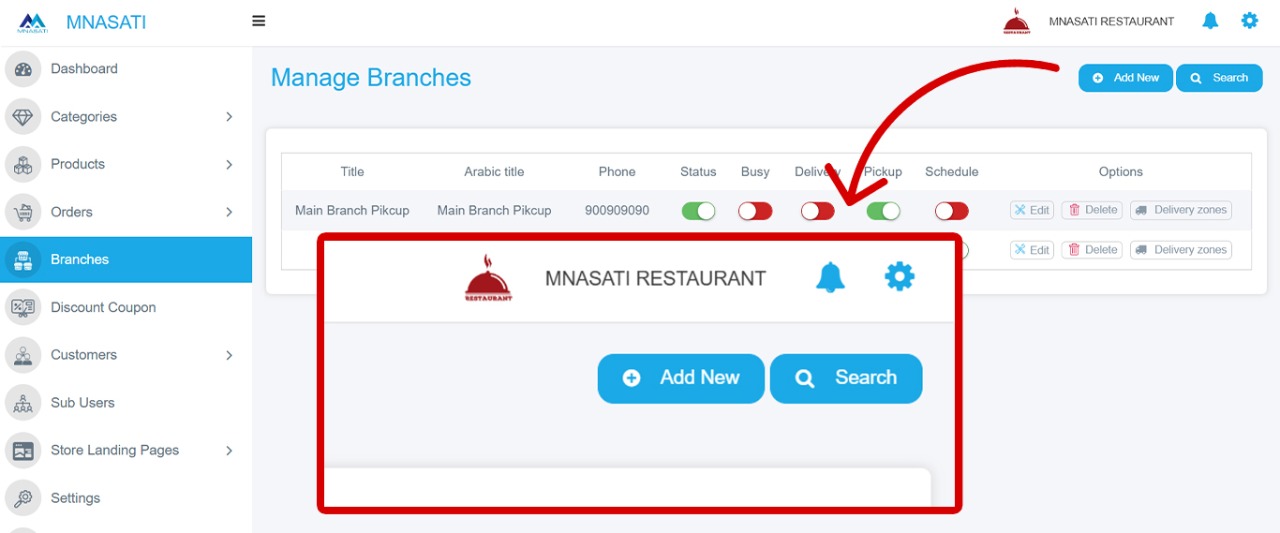
Access the Branch Management Page
- From the sidebar menu, click Branches.
- A list of all existing branches will be displayed.
Create a New Branch
- Click the Add New button at the top-right corner of the page.
- You will be redirected to the New Branch Details page.
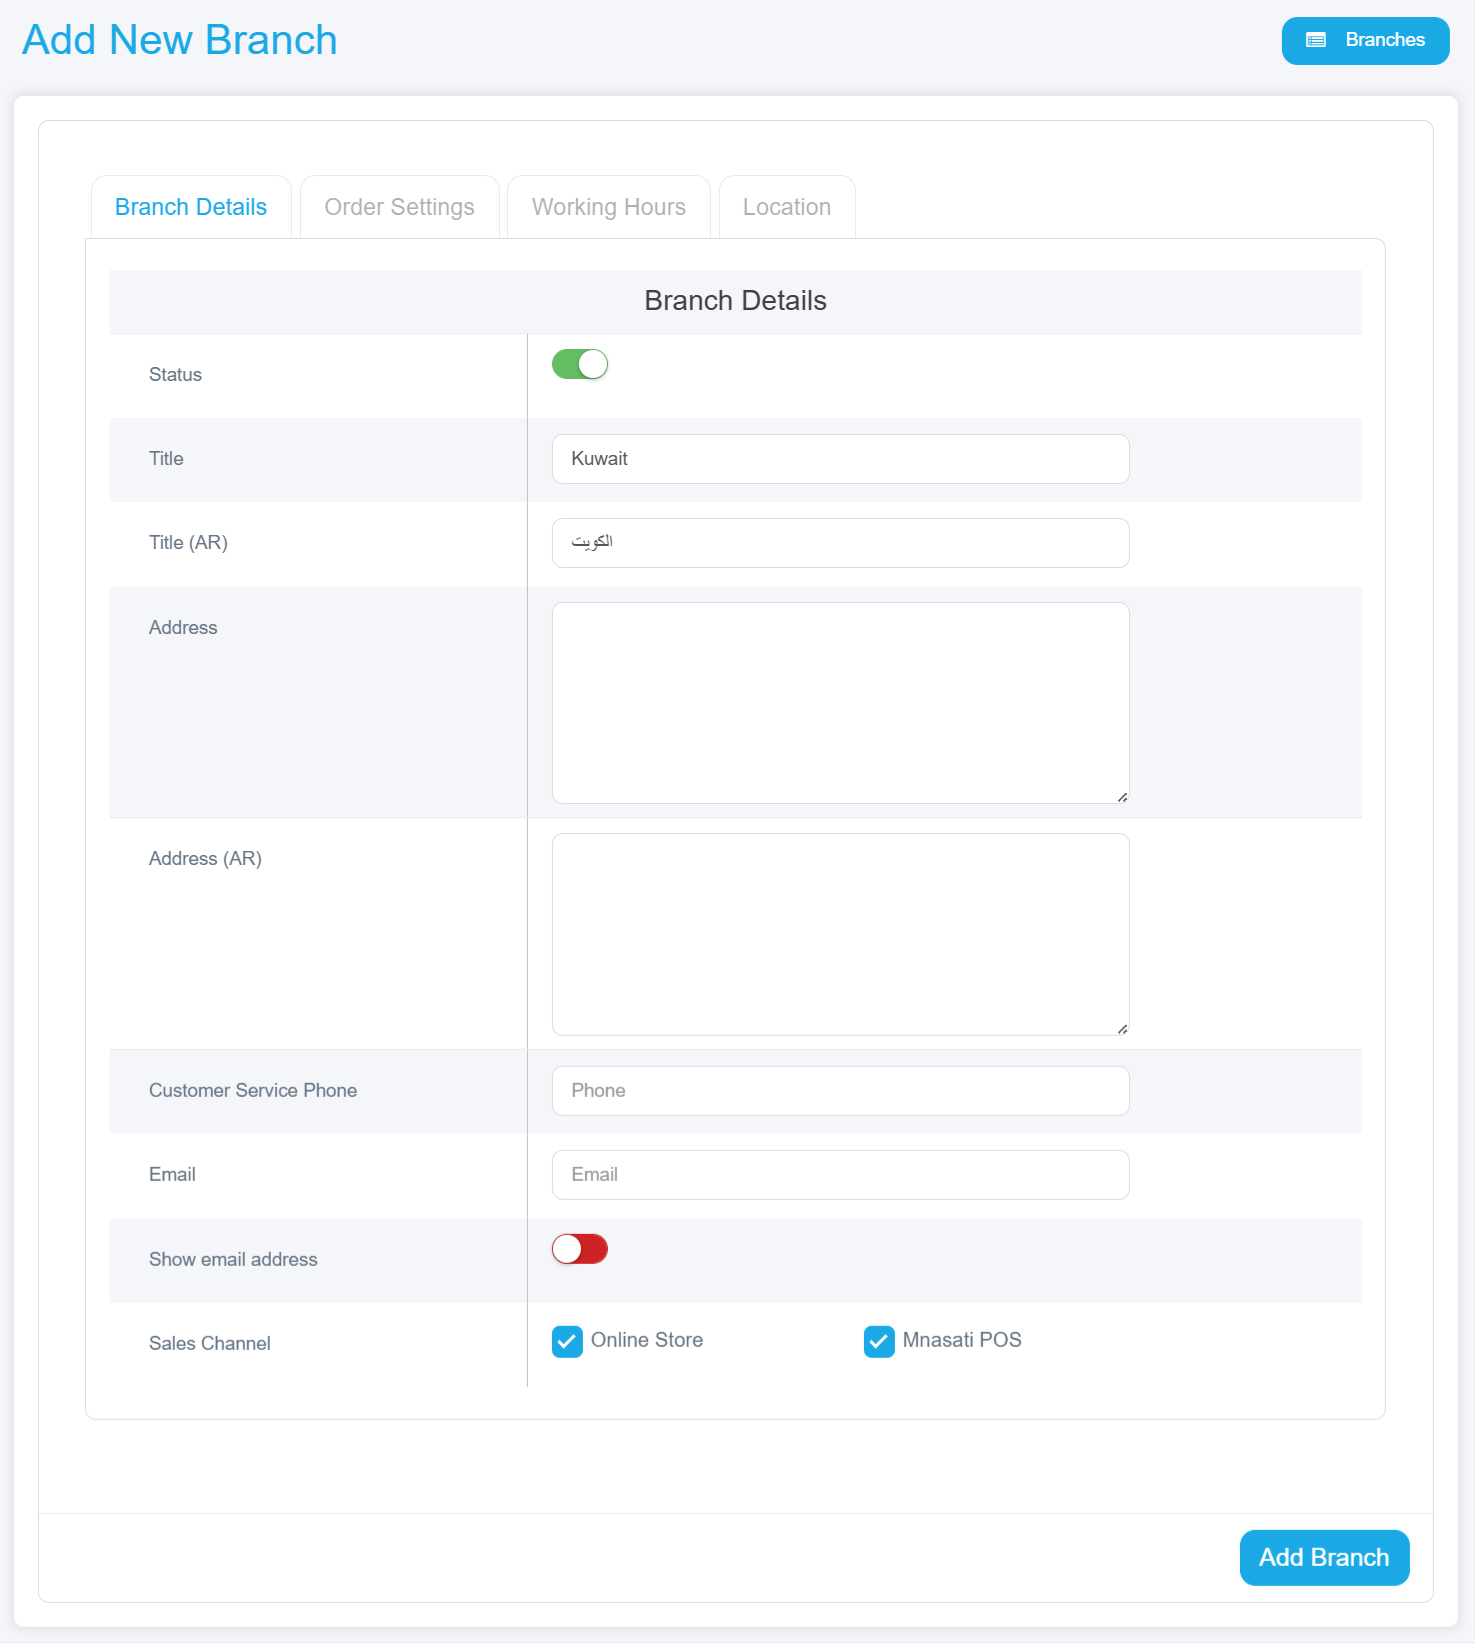
Enter Branch Information
- Status: Enable or disable the branch.
- Title (EN/AR): Branch name in English and Arabic.
- Address (EN/AR): Full branch address.
- Phone: Branch phone number.
- Email: Branch email address and option to display it to customers.
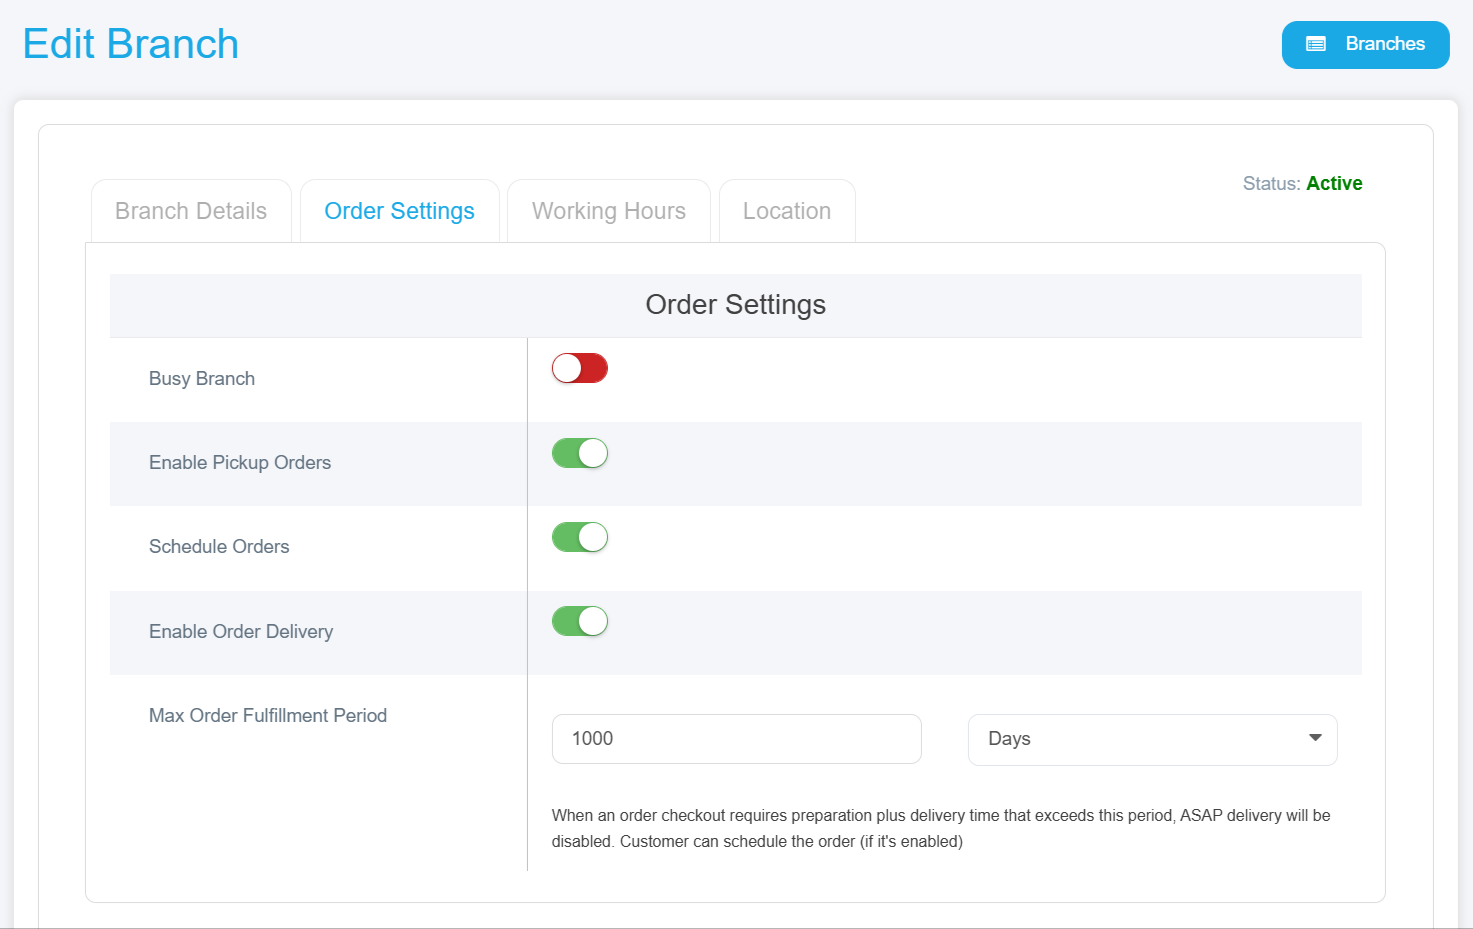
Order Settings
- Busy Branch: Specifies if the branch is currently unavailable. When enabled, customers will see a notification that the branch is busy and cannot accept orders at the moment.
- Enable order Delivery: Enable or disable delivery service for the branch.
- Enable Pickup Orders: Allow customers to pick up orders directly from the branch.
- Schedule orders: When enabled, allows customers to select a preferred time for product pickup according to their schedule.
Working Hours (Optional)
- Set Working Hours define the branch operating hours for each day of the week. The system operates 24 hours for order pickup from the branch.
Location
- Enter the latitude and longitude coordinates, which can be obtained from Google Maps.
Save Settings: Click the Save button at the bottom of the page. The new branch will be added to the branches list, and you can now view it in the branches table with all its details.
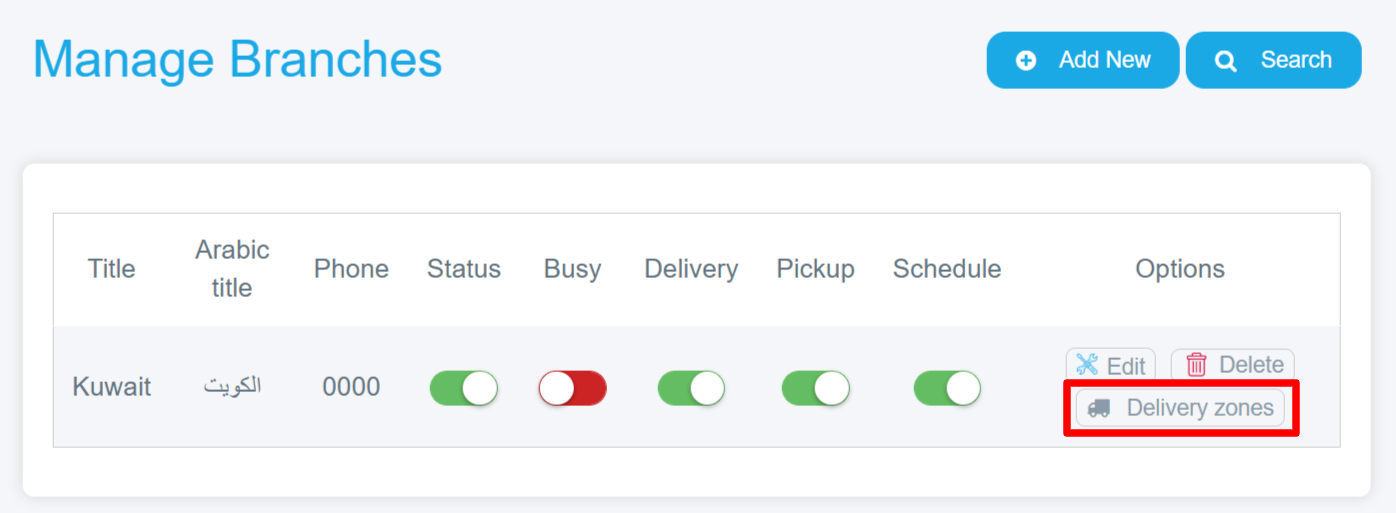
Delivery Zones
After saving the branch details, you can now easily add and customize the delivery zones for the branch by following these steps:
- Click the Delivery Zones button in the Actions column next to the desired branch.
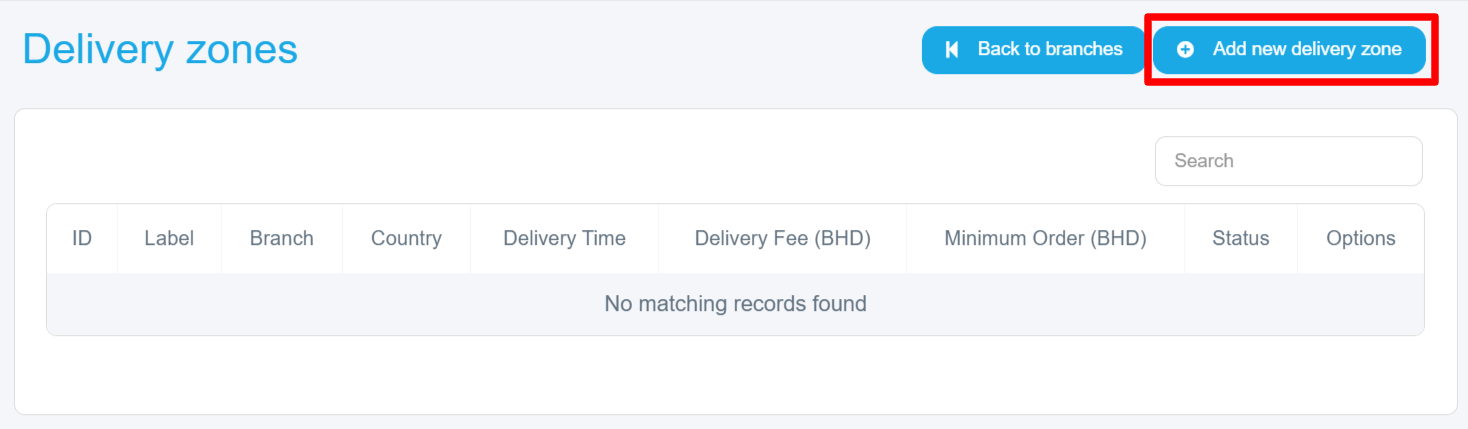
- You will be redirected to a new page titled Delivery Zones, which may initially be empty if no zones have been added before.
- Click the Add New Delivery Zone button at the top-right of the Delivery Zones page.
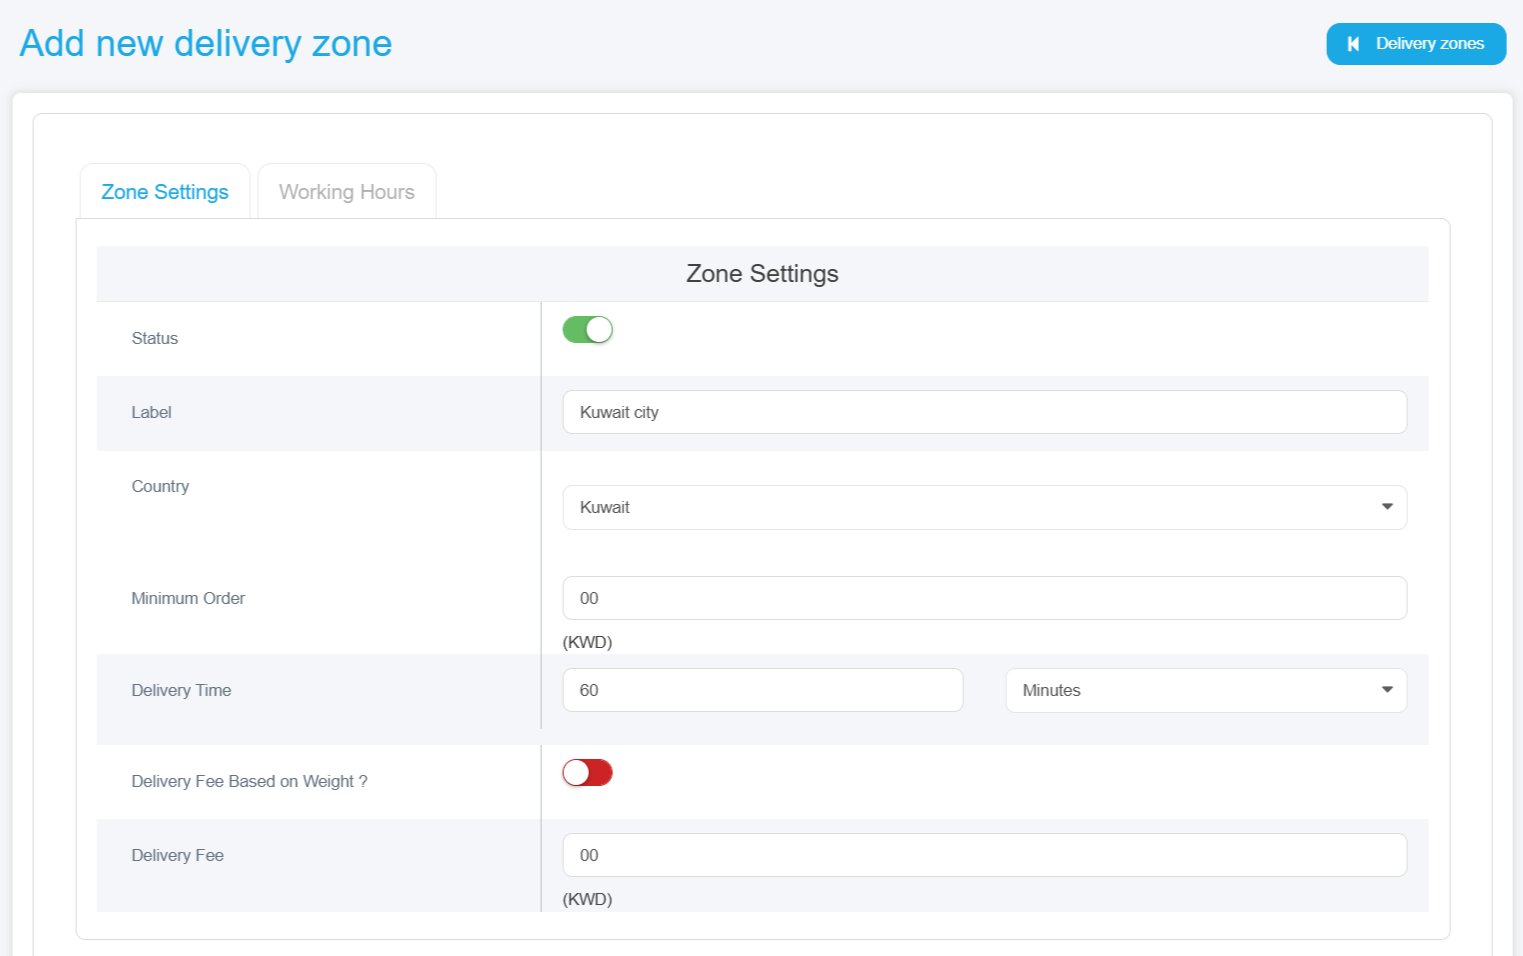
- Zone Settings: A settings page will appear with several options:
· Status: Enable or disable the zone using the toggle switch at the top of the page.
· Label: Enter a clear name for the zone, such as "Capital Area" or "Jahra," to make it easily identifiable.
· Country: Select the country from the dropdown menu (e.g., Kuwait or other available countries).
· Minimum Order: Specify the minimum order value a customer must reach to place an order in this zone.
· Delivery Time: Enter the estimated delivery time in the designated field and select the time unit from the dropdown menu (minutes, hours, days).
· Delivery Fee Based on Weight: Enable this option if you want to calculate the delivery fee based on the order’s weight.
· Delivery Fee: Set a fixed delivery fee for this zone.
· Working Hours: specify delivery hours for each day of the week, noting that the system operates on a 24-hour delivery schedule.
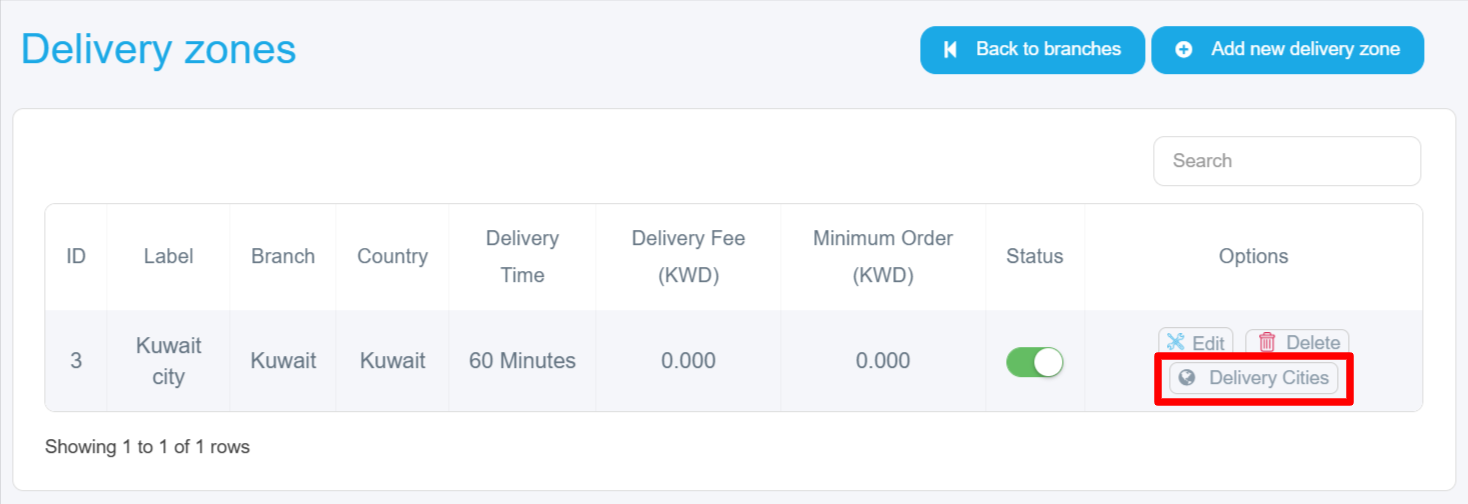
· Save Settings: Click the Save button at the bottom of the page. The new zone will be added to the branch’s delivery zones list. You can now view the zone in the delivery zones table with all its details.
Delivery Cities
After setting up the basic delivery zones for your store, the next important step is to define the delivery cities covered by your service by following these step
1. Select the Zone: Choose the zone you want to add cities to. You will see multiple options such as Delete, Edit, and Delivery Cities. Click on Delivery Cities.
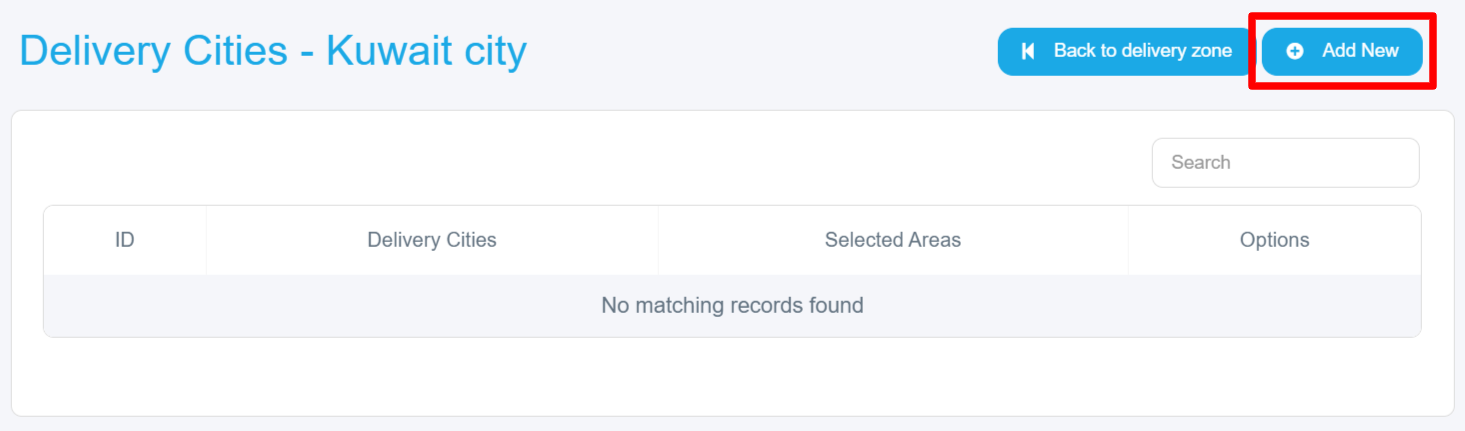
2. You will be redirected to a new page titled Delivery Cities, where you can manage all cities associated with this zone.
3. At the top-right of the page, you will find a blue Add New Delivery Zone button.
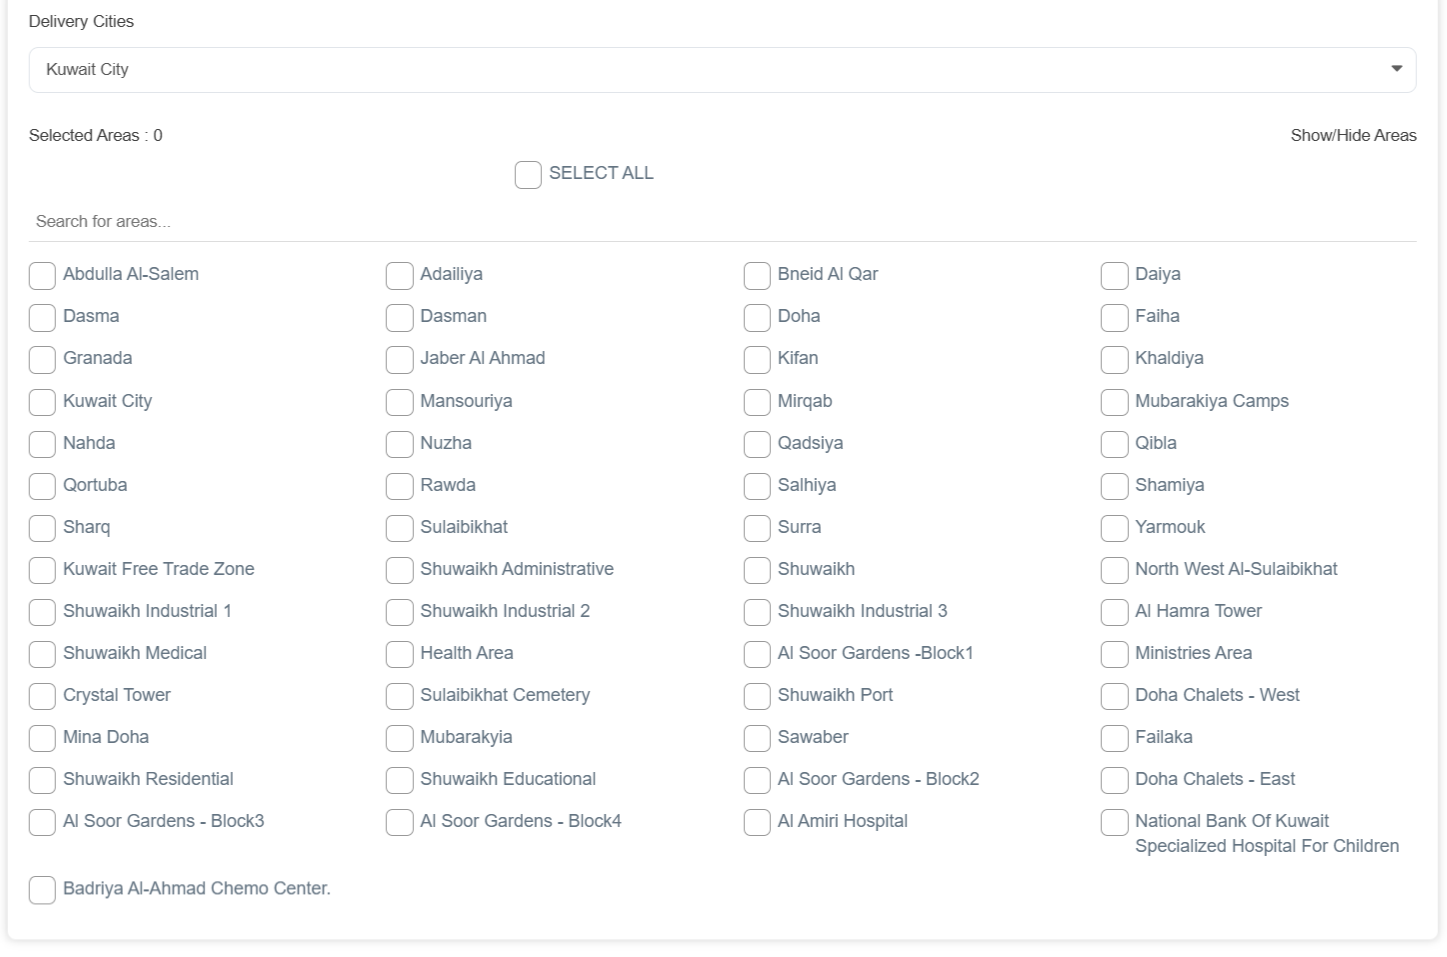
4. After clicking the Add button, a page will appear containing a dropdown list to select cities, labeled Delivery Cities, with a select field.
5. Select the Delivery Cities:
· Individual Selection: Click the checkbox next to each city you want to add. The selected cities will be automatically updated in the selected count.
· Bulk Selection: To select all cities, simply click the Select All checkbox at the top of the list.
· Use Search: If you are looking for a specific city, use the search field to filter the list and quickly find the desired city.
6. Save: Click the Save button to add the selected cities to the delivery zone. The added cities will appear in an organized table.